
This guide will help you properly configure Mozilla Thunderbird for use with RBVI or SACS e-mail. Thunderbird is an excellent cross-platform e-mail client that works very well with our e-mail services, and has a broad following within the Internet. Thunderbird is a free, open source package that is available at http://www.mozilla.com/en-US/thunderbird/. All of the images shown below were taken with a Macintosh computer, but apply equally (except for menu position, as noted) to Linux and Windows computers. This guide will help you configure Thunderbird to read mail from socrates.cgl.ucsf.edu, which is the RBVI/SACS cluster, send mail through the cluster, and use either our LDAP services or the UCSF LDAP server for your directory lookup.
Throughout this guide, you will note screenshots of the actions being described in the text. These have been intentially been sized relatively small to avoid damaging the flow of the text for those who do not feel they have a need to see the actual screenshot. If you click on these images, they will open up a full-sized image in another window.
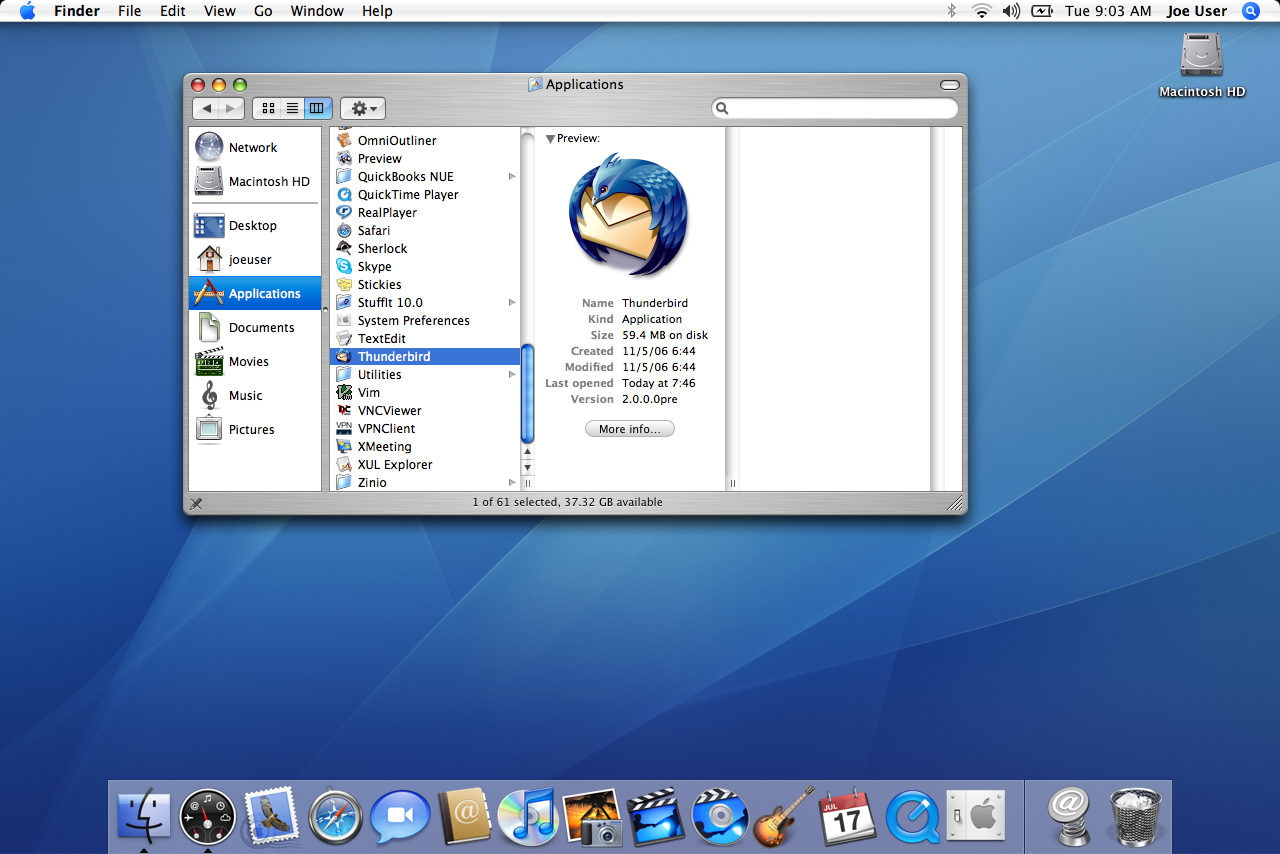
Download Thunderbird from: http://www.mozilla.com/en-US/thunderbird/, and run the installer (double-click on a Mac or Windows computer). On a Macintosh computer, slide the application into your Applications folder. On a Windows computer, Thunderbird will install in the default location (usually Program Files). Once Thunderbird is installed, open it up by double-clicking the Thunderbird icon, or running Thunderbird from the shell.
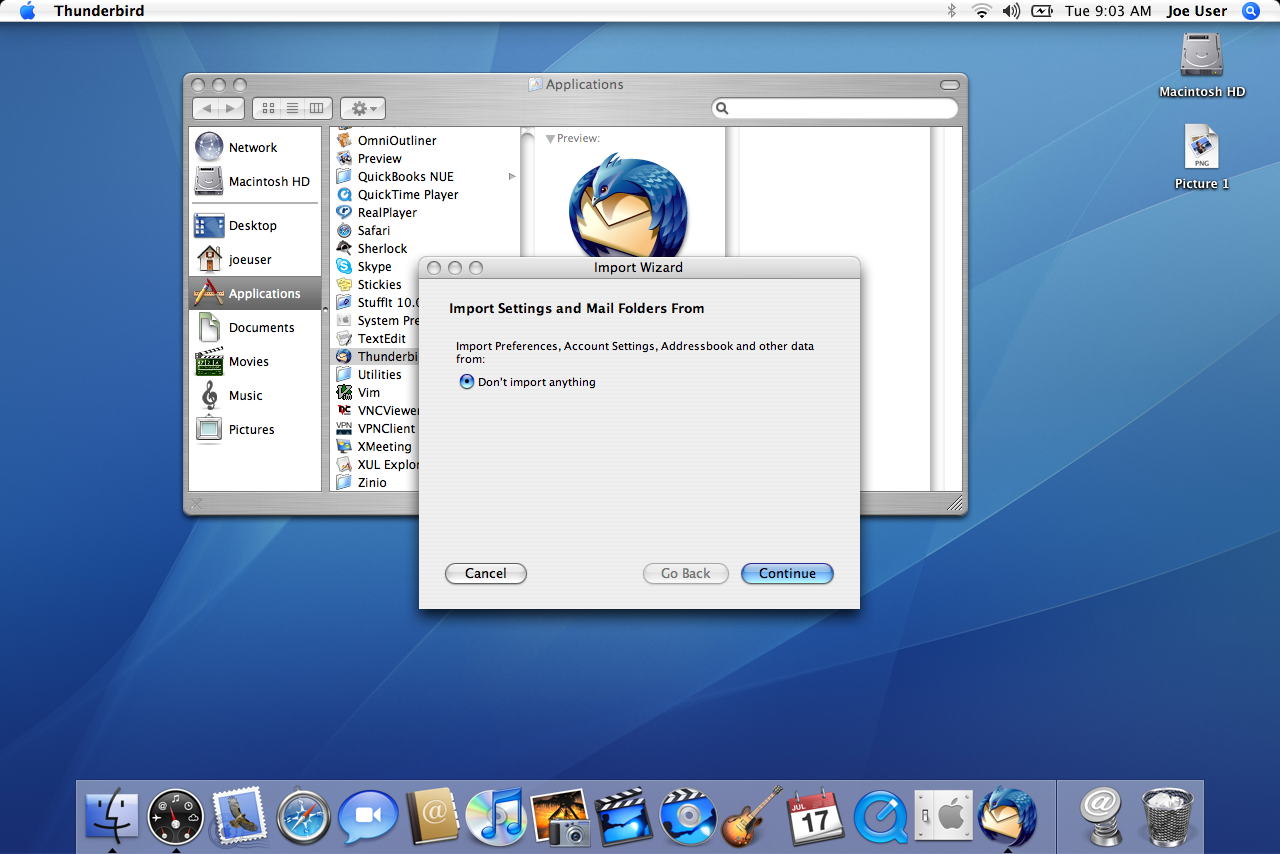
When Thunderbird opens up, it will begin by asking if you want to import anything from you previous settings or e-mail client. (You may want to import your existing e-mail folders, but we suggest that you do not import your settings since you may not get the most out of Thunderbird if you do.)
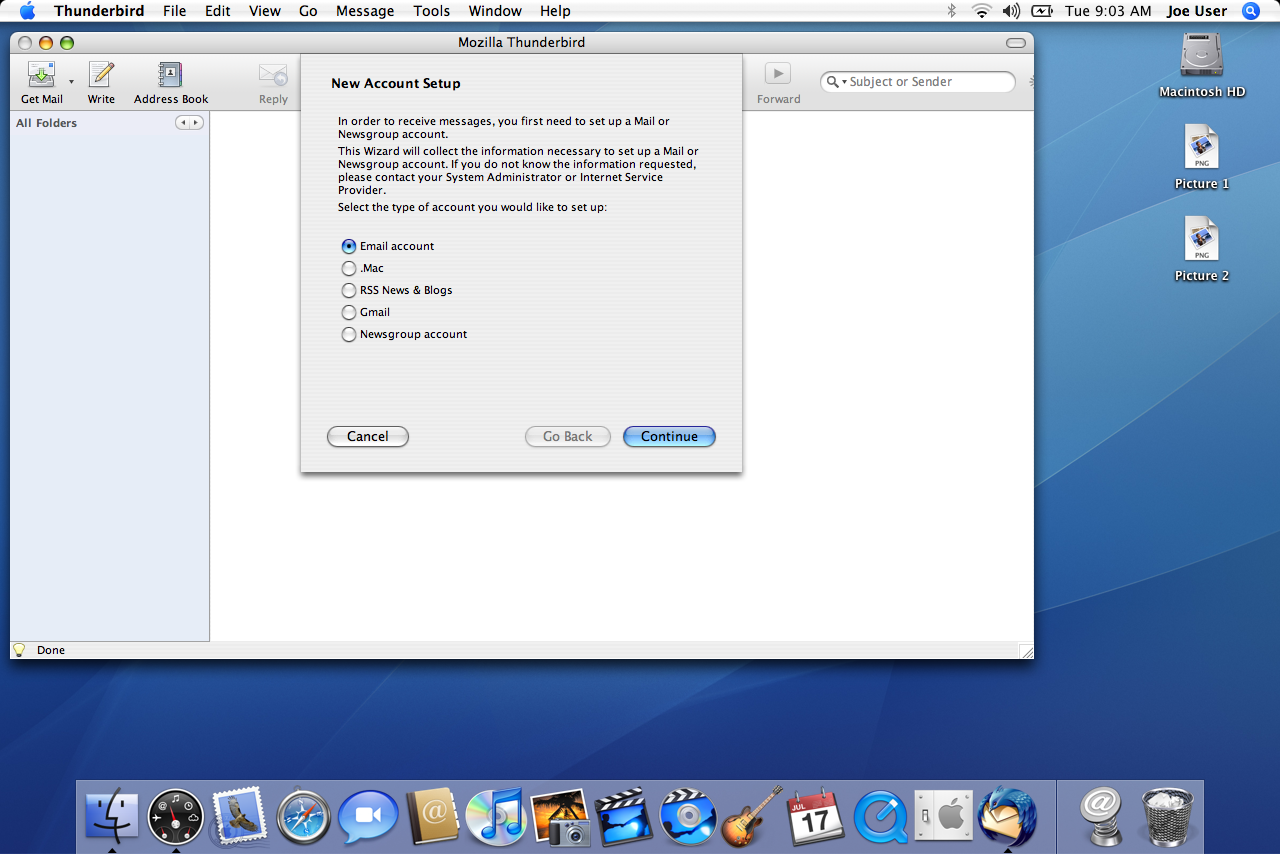 If you did not import your existing account information,
the first thing Thunderbird will do is ask you to create a new account. We're
going to create an E-Mail account that will synchronize will your mail on socrates
(see the sidebar on E-Mail Account Types
on the right). Select "Email Account" (the default) and click on .
If you did not import your existing account information,
the first thing Thunderbird will do is ask you to create a new account. We're
going to create an E-Mail account that will synchronize will your mail on socrates
(see the sidebar on E-Mail Account Types
on the right). Select "Email Account" (the default) and click on .
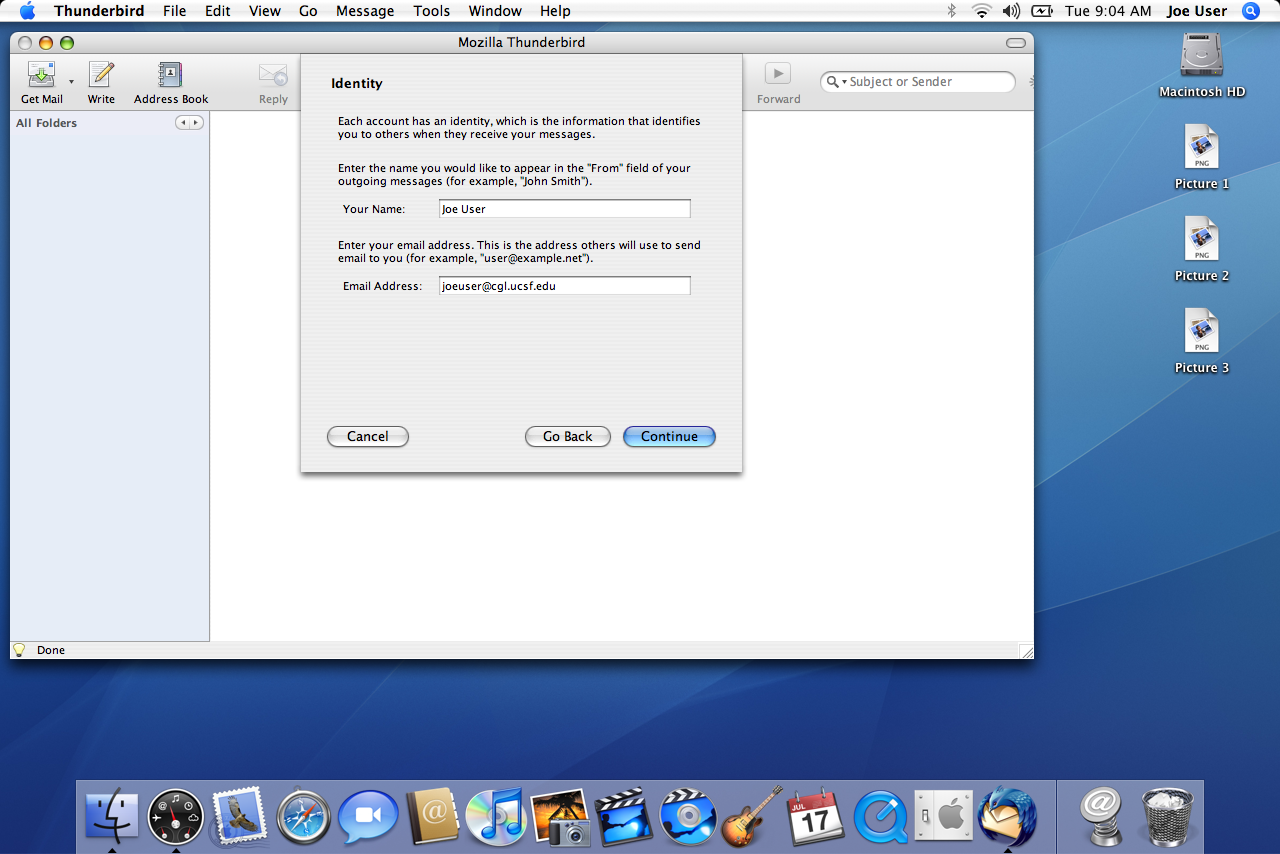 The next step is to enter your name and Email address. Thunderbird
refers to this as your Identity. Type in your full name and your RBVI/SACS Email address -- usually
username@cgl.ucsf.edu. This information will be used on your outgoing Email to identify you. Once
you have done that, click .
The next step is to enter your name and Email address. Thunderbird
refers to this as your Identity. Type in your full name and your RBVI/SACS Email address -- usually
username@cgl.ucsf.edu. This information will be used on your outgoing Email to identify you. Once
you have done that, click .
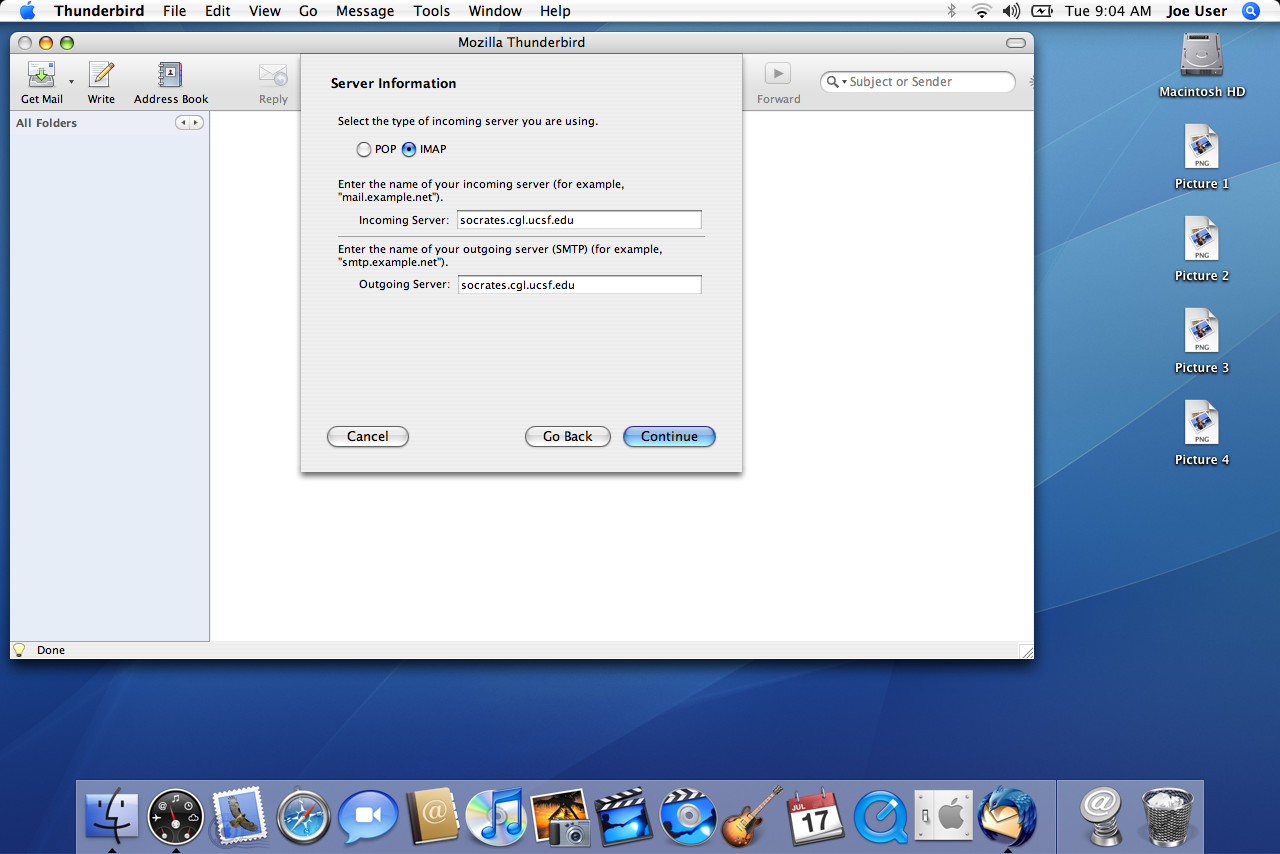 Thunderbird now needs to get the information about our
servers. This is where you select IMAP as the type of incoming server, and socrates.cgl.ucsf.edu
as both the incoming and outgoing server. As before, when you are done, click on
.
Thunderbird now needs to get the information about our
servers. This is where you select IMAP as the type of incoming server, and socrates.cgl.ucsf.edu
as both the incoming and outgoing server. As before, when you are done, click on
.
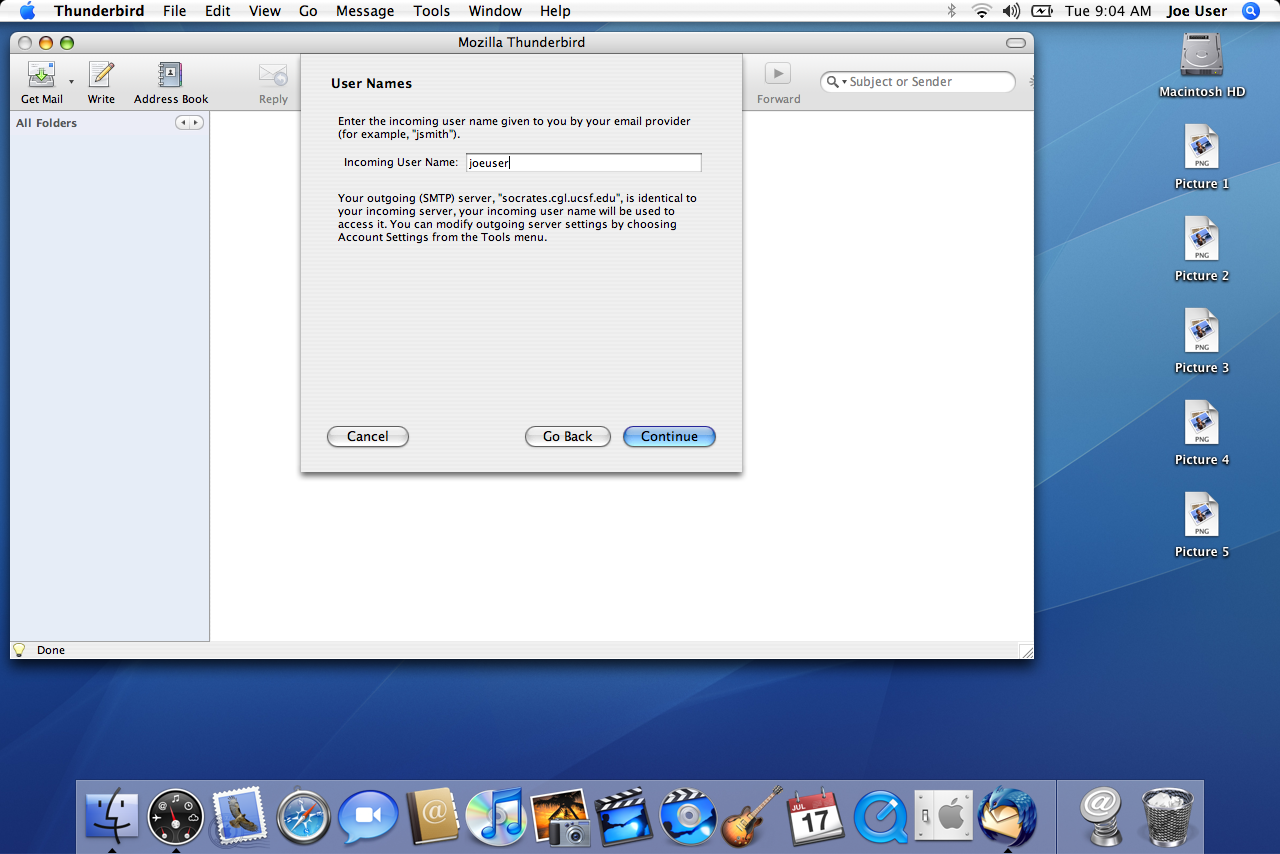 You will also need to specify your RBVI/SACS username. This information will be used
by Thunderbird when you log into socrates.cgl.ucsf.edu. Now click on
.
You will also need to specify your RBVI/SACS username. This information will be used
by Thunderbird when you log into socrates.cgl.ucsf.edu. Now click on
.
 The final step in the Account Creation wizard is to name the account.
In principal, this can be anything that helps you remember that this account is used for. By
default, the Email address you provided will be used as the account name, and this is probably
a reasonable choice.
After you are done, click on
.
The final step in the Account Creation wizard is to name the account.
In principal, this can be anything that helps you remember that this account is used for. By
default, the Email address you provided will be used as the account name, and this is probably
a reasonable choice.
After you are done, click on
.
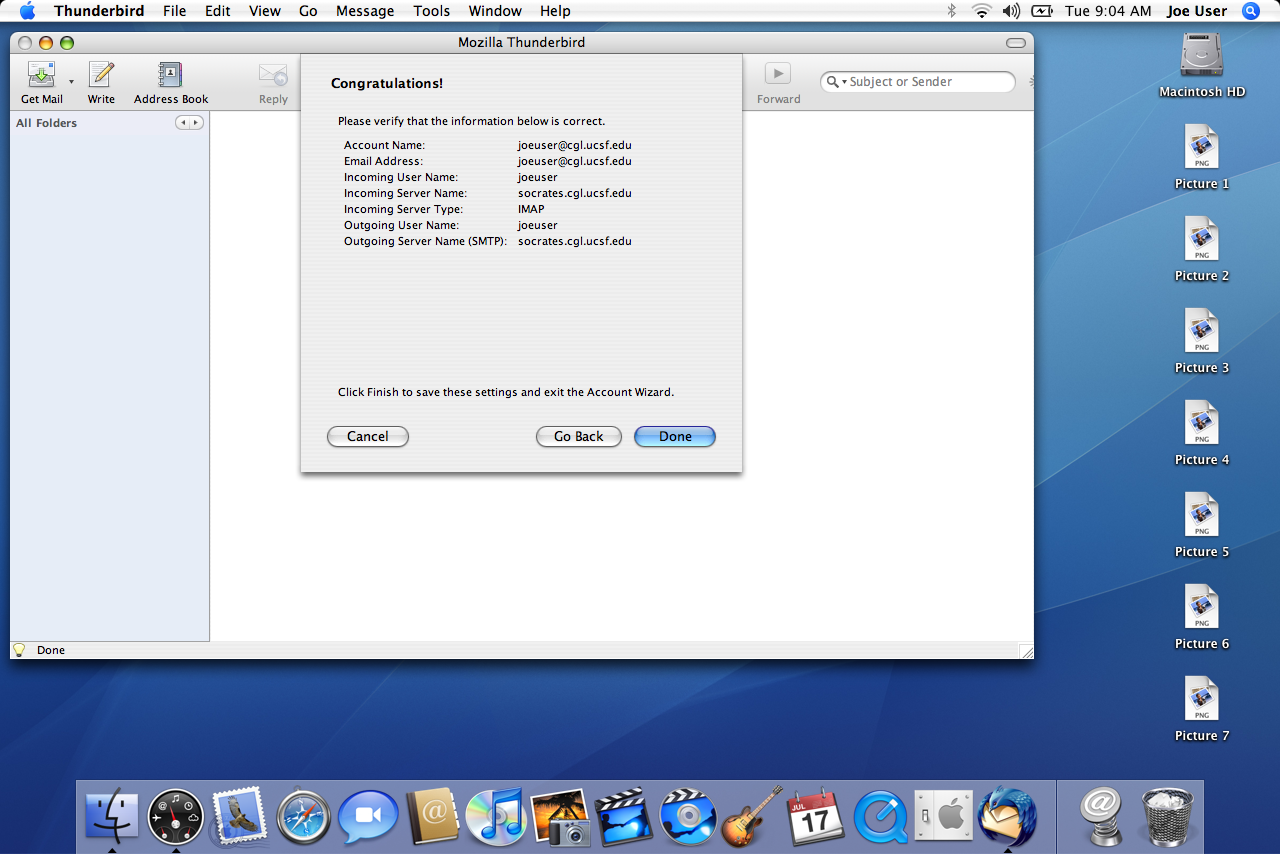 You are now presented with a screen that congratulates you and implies that you are done. In
fact, we are not quite done, yet.
You are now presented with a screen that congratulates you and implies that you are done. In
fact, we are not quite done, yet.

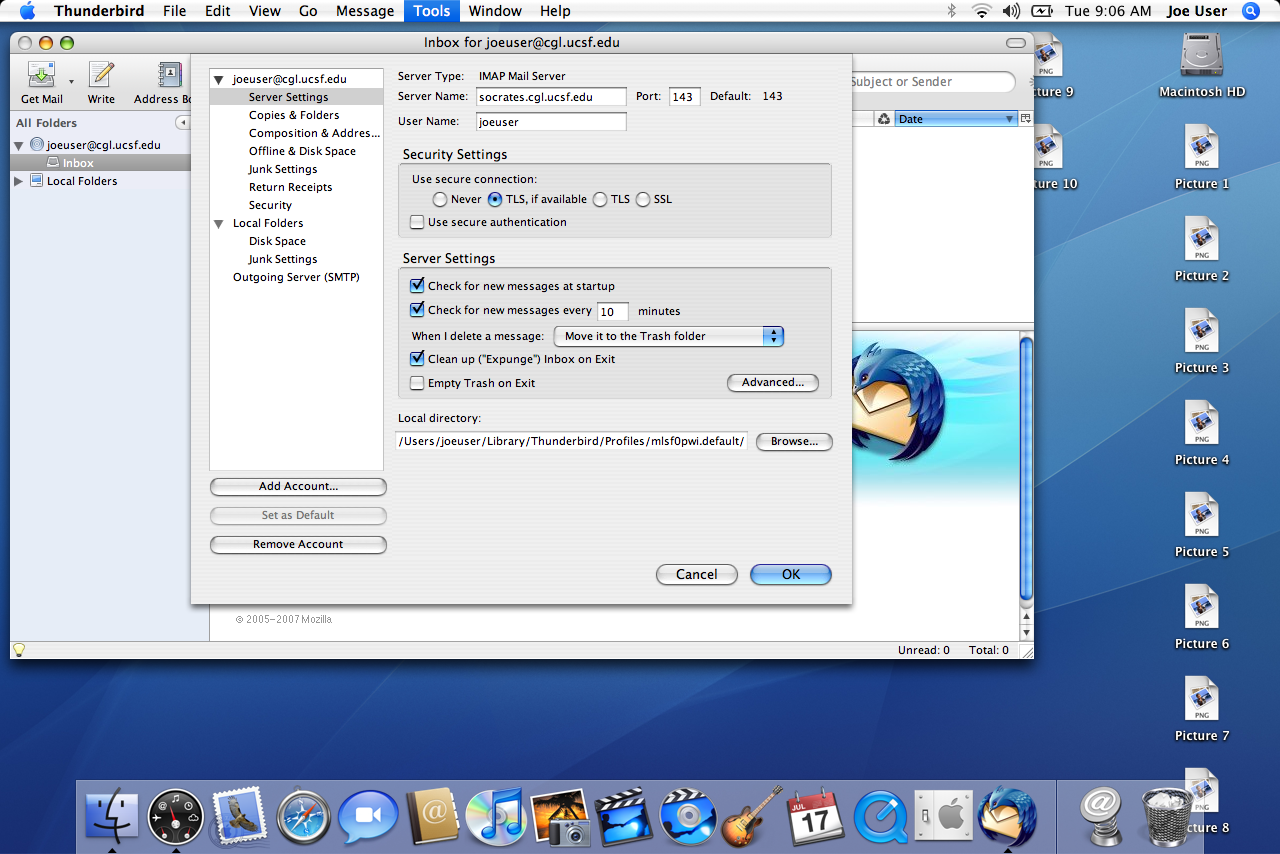
Now that we have an account, we're going to make some final adjustments to the configuration that allows Thunderbird to work better with our IMAP server. Our account settings can be found under the Tools menu. The last item in the menu is Account Settings...: open this up, and you should see the Account Settings dialog shown at the right. As you can see, all of the settings that you provided to the New Account wizard are availalbe, along with a number of additional parameters. Right now, we're going to want to select "Server Settings" from the left-hand pane under your new account name. This will bring up the Server Settings dialog. There are a small number of values we want to set. First, select TLS, if available. This will instruct Thunderbird to encrypt traffic to and from the server, if the server supports that functionality (ours does). Second, select Clean up ("Expunge") Inbox on exit. This setting will direct Thunderbird to tell the server to actually remove deleted messages. While Thunderbird moves deleted messages to a "Trash" folder, those messages aren't actually removed from your Inbox until it is "compressed" or "expunged". When this happens, your Inbox is rewritten to actually remove those messages -- otherwise, your Inbox can grow very large!
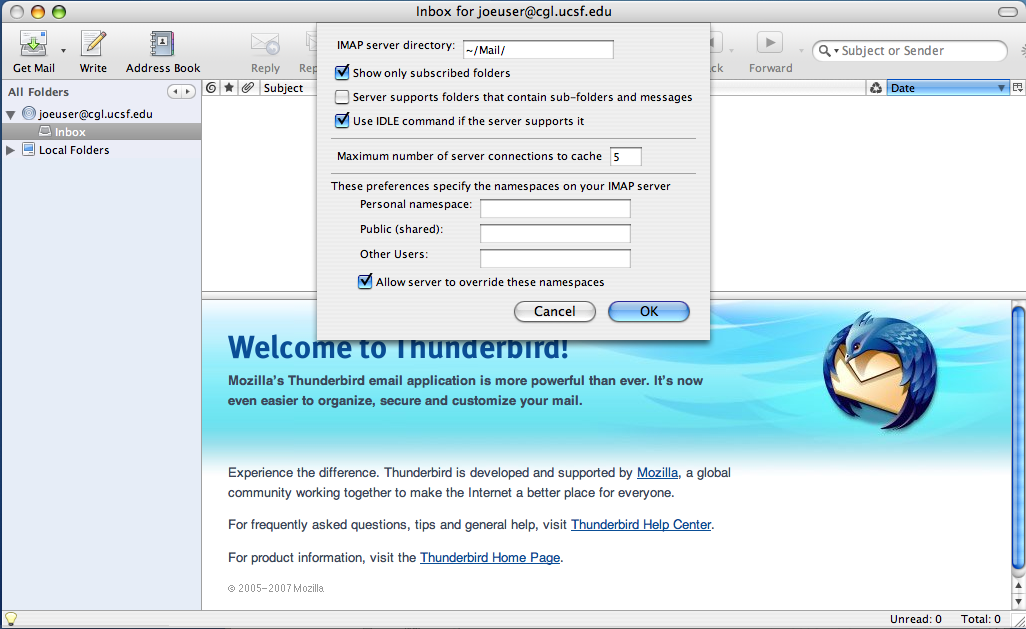
The final step in configuring our server is to click on to tell Thunderbird where our server stores your mail. In the Advanced Server Settings dialog, change the IMAP server directory: settings to: "~/Mail/". Since our UNIX server needs to be compatable with so manner different Email clients, we don't support sub-folders and messages in the same folder, so you want to uncheck Server supports folders that contain sub-folders and messages. Finally, click on to get back to the main Settings dialog, and click again to save your changes.
By default, Thunderbird will save the Email addresses of people you send mail to in a local "Address Book". This information is used when you are composing a new message to save typing or help you remember Email addresses. If this is the first time you have sent a message to this user, however, this "Collected Addresses" functionality won't help you. Fortunately, Thunderbird supports the Lightweight Directory Access Protocol: LDAP. LDAP allows an Email client (such as Thunderbird) to look up addresses from a central repository. The RBVI maintains a repository with all of our users and many of the QB3 users. UCSF also provides an LDAP repository, but be aware that the UCSF repository is only available when you are on campus.
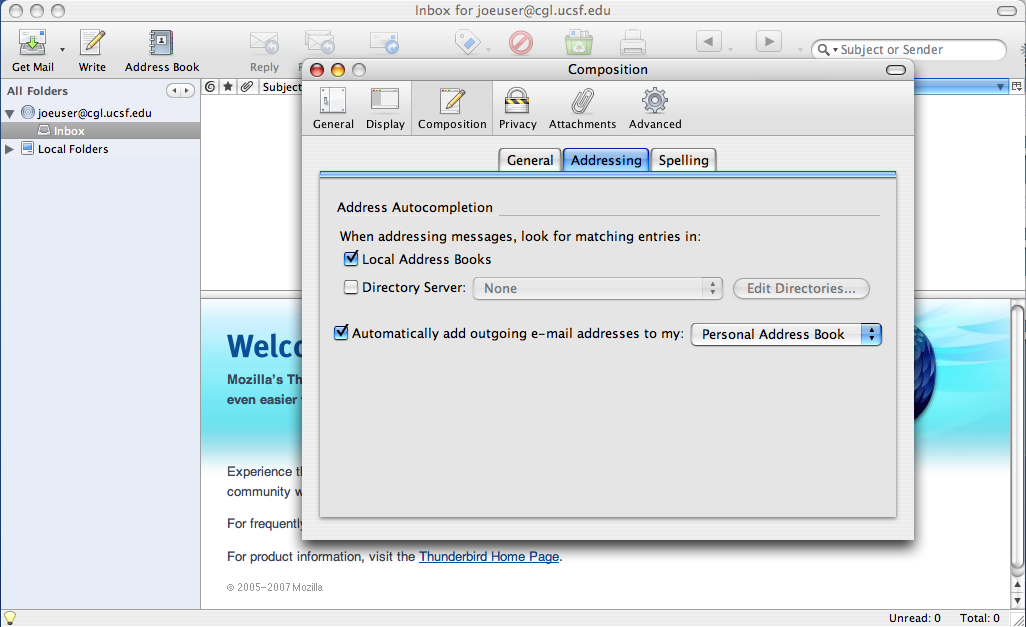
To configure LDAP servers for Thunderbird, bring up the Thunderbird Preferences... dialog. On a Macintosh, this dialog is under the Thunderbird menu. On a Windows machine, it will be under the Edit menu. The preferences dialog provides access to the major Thunderbird preferences. To get the LDAP preferences, select the Composition icon, then select the Addressing tab.
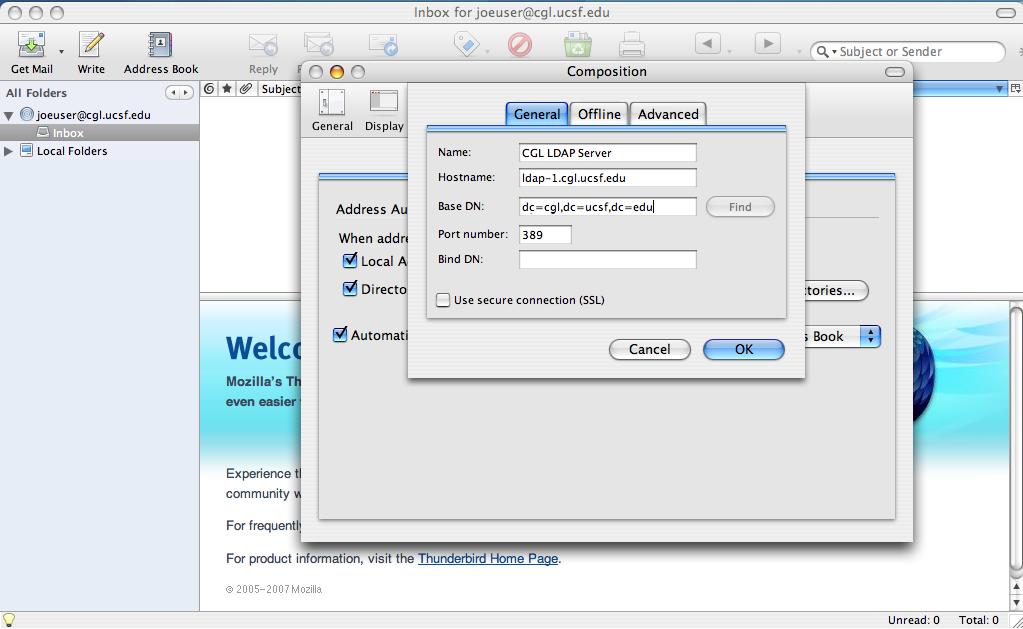
On the Addressing tab, you will notice a checkbox for Directory Server. If you check that and selecte Edit Directories... you will be able to enter the configuration information for the two LDAP servers. Once the list of LDAP directories comes up (it should initially be empty), select to add the first directory. To begin with, we'll add the information for the CGL (RBVI/SACS) LDAP directory. Type in something meaningful for the Name like "RBVI Directory" or "SACS directory". The actual name doesn't matter in this case, it's just used as a label to help you get the right directory. The Hostname is ldap-1.cgl.ucsf.edu (and it does matter), and the Base DN is dc=cgl,dc=ucsf,dc=edu. In case you were wondering, the Base DN is just a sort of lookup field to tell Thunderbird enough about the directory to help it find the necessary information.
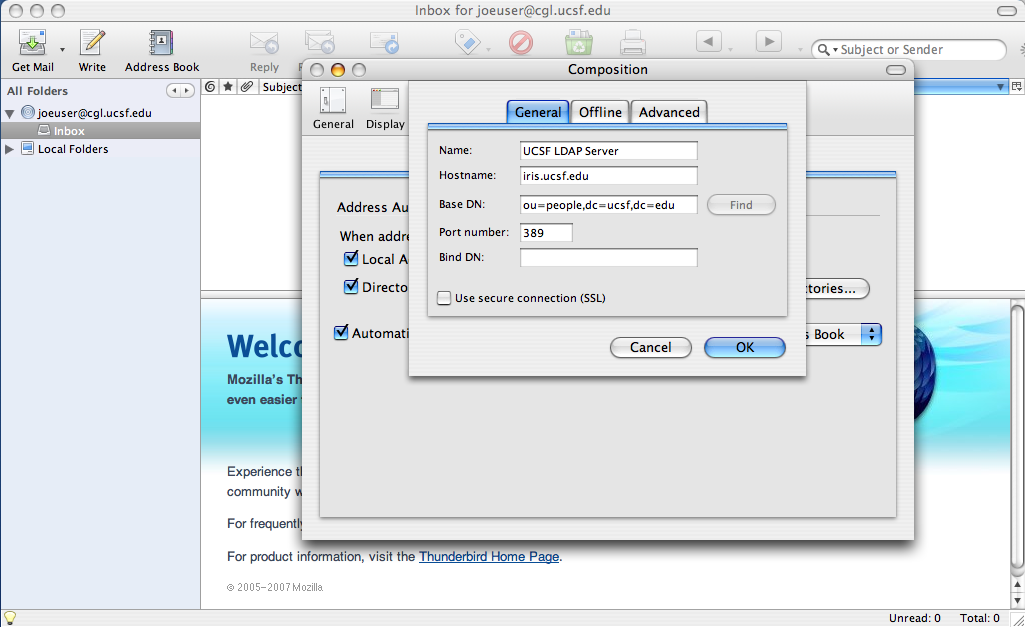
If you desire, you can now repeat the steps above (starting with the to add the UCSF repository. Be aware that the UCSF LDAP repository is not officially supported, yet (I think it's still in a sort of Beta state), but it has proven to be pretty reliable, both in terms of availability and accuracy of the data. In any case, if you wish to enter the UCSF information, the Hostname is iris.ucsf.edu and the Base DN is ou=people,dc=ucsf,dc=edu.
Once you have created all of your directory servers, you can press to get back to the Preferences and then you should be ready to go. I would recommend exiting Thunderbird and restarting. This will give Thunderbird a chance to read in any folders you might have and create its data structures appropriately.
For those who are configuring Thunderbird for a laptop, or at home when you might not have continuous access to the Internet, you may want to configure Thunderbird to work in offline mode. Basically, this will cause Thunderbird to download the content of all of the messages in your Inbox to your computer. Normally, Thunderbird will only download the message headers until you actually read the message, then the body of the message (the content) will be displayed, but it will not be saved on your computer. This minimizes the duplication of the content and is normally a "good thing" -- unless you can't get access to the server -- then it becomes a definite "bad thing". Thunderbird's offline mode, however, in conjunction with features of the IMAP server rectifies this by allowing you to download all of your messages to your local computer, and by allowing you to synchronize things back up to the server when you are once again online. This means that operations like moving or copying messages to folders and deleting messages can be done when you are offline, and then will take effect on the server when next you connect.
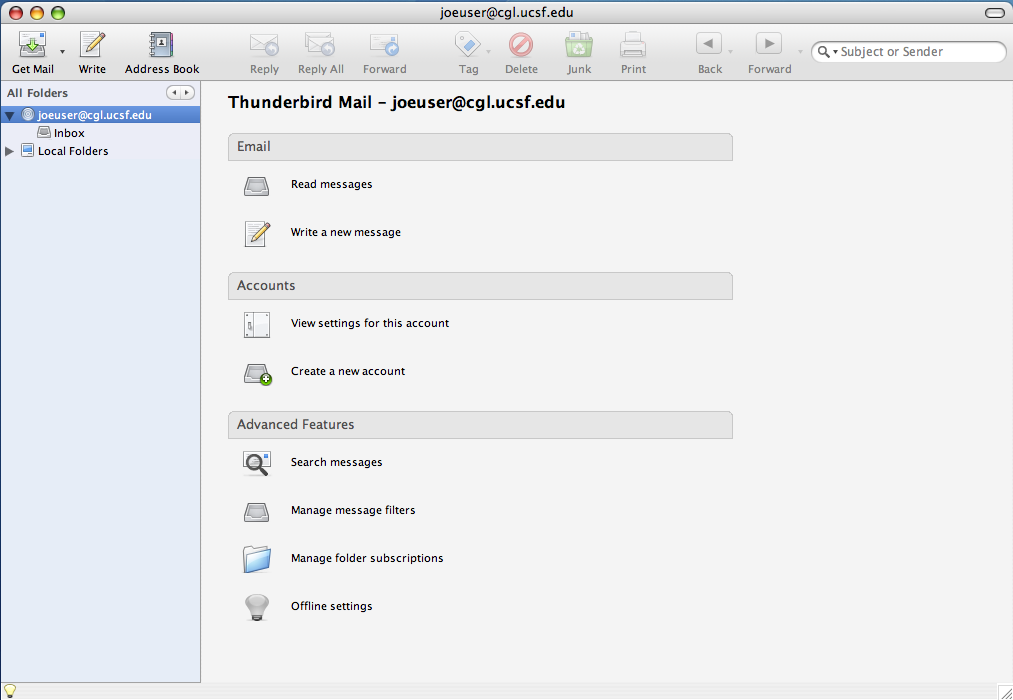 Configuring for offline use is easy. Click on the account you just created in
Thunderbird's
left hand pane. This will bring up a list of actions/preferences for that account
in the right hand pane. Select Offline settings under
Advanced features near the bottom of the pane. You may need
to scroll down to get to it.
Configuring for offline use is easy. Click on the account you just created in
Thunderbird's
left hand pane. This will bring up a list of actions/preferences for that account
in the right hand pane. Select Offline settings under
Advanced features near the bottom of the pane. You may need
to scroll down to get to it.
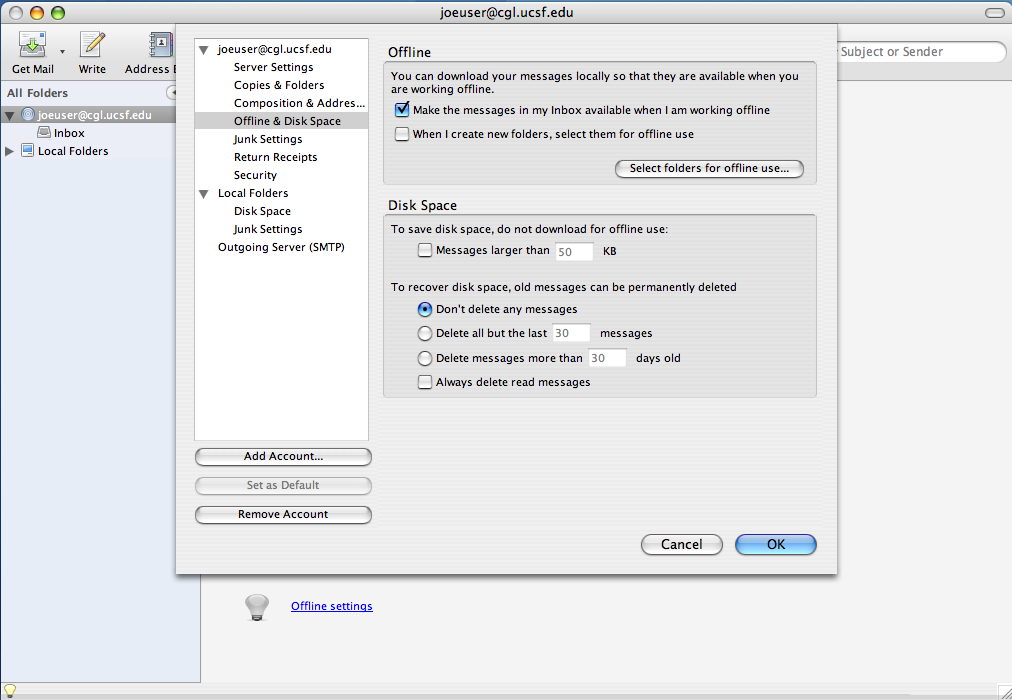 To enable the offline features, simply click on the checkbox for
Make the messages in my Inbox available when I am working offline.
You can also select other folders to be available offline by clicking on the
, but be aware that the
more folders you select for offline use, the longer it will take to actually
synchronize and go offline. After you are done, click to
finish up.
To enable the offline features, simply click on the checkbox for
Make the messages in my Inbox available when I am working offline.
You can also select other folders to be available offline by clicking on the
, but be aware that the
more folders you select for offline use, the longer it will take to actually
synchronize and go offline. After you are done, click to
finish up.
To actually go into offline mode so that all of your operations are based on your local copy of messages, simply select File→Offline→Work Offline and then click to download your messages. That's it!